Step 2. Certificate prompt
https://blog.simonelberts.nl/2022/06/certificate-prompt-certificate.html
Step 3. Certificate Authentication
https://blog.simonelberts.nl/2022/06/passwordless-sso-with-workspace-one.html
Federate Office 365 to a Third Party Identity Provider (Workspace ONE Access)
To use Single Sign On with Office 365, you will need to federate your Office 365 domain to a Third Party Identity Provider. In this case I will use VMware Workspace ONE Access.
In the following video you can see the seamless user experience when the federation is configured:
- Powershell on Windows is required
First the necessary modules needs to be installed with the following command:
Install-Module -Name MSOnline
After the MS Online module is installed, you should be able to connect to MS Online with the following: (login with your tenant administrator in the popup)
Connect-MsolService
After logging in, you can get the current domains listed with the following command:
Get-MsolDomain
This is what i see and you can see that none of my domains are federated at this point:

To federate your Office 365 domain, you will need to use the following command and fill in your domain and urls in the highlighted areas:
To get the correct Signing Certificate format, navigate to your Workspace ONE Access tenant and go to: Catalog - Settings - SAML Metadata:
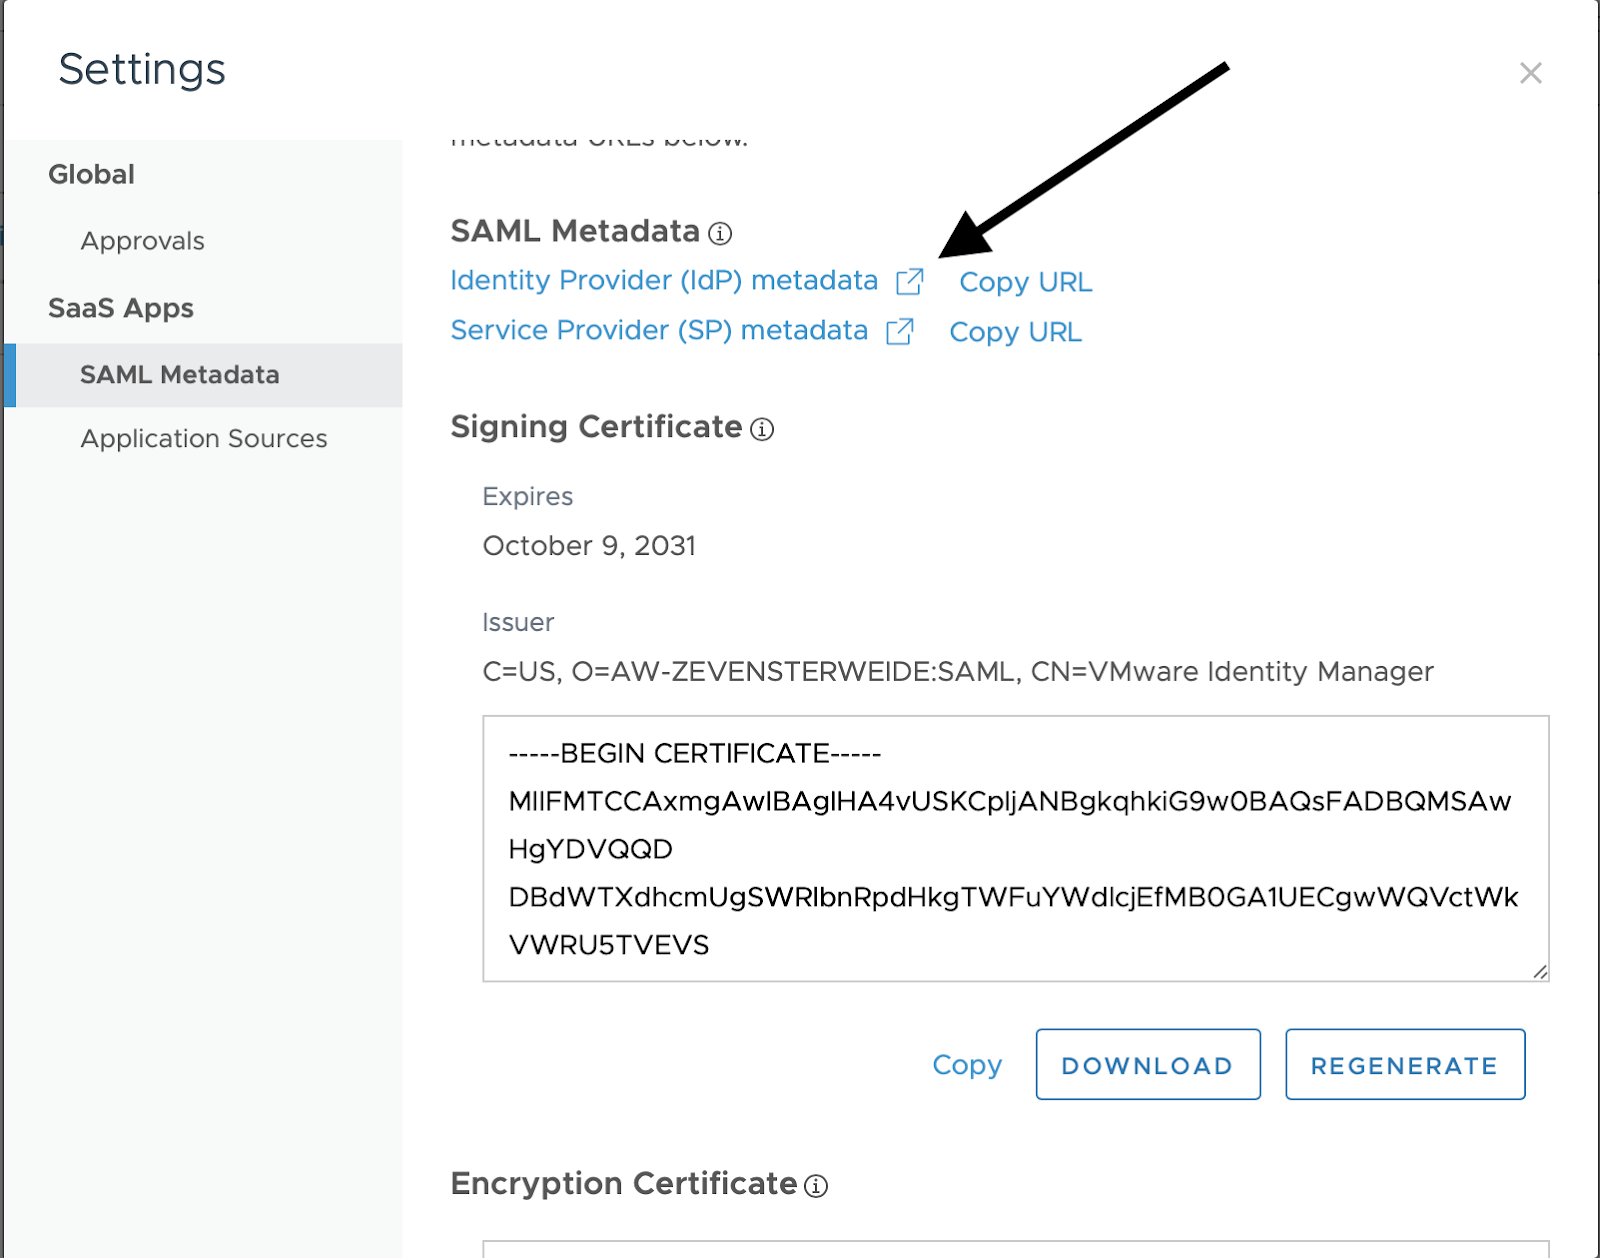
In this screen you will find the Signing Certificate in the correct text format (without spaces etc.)
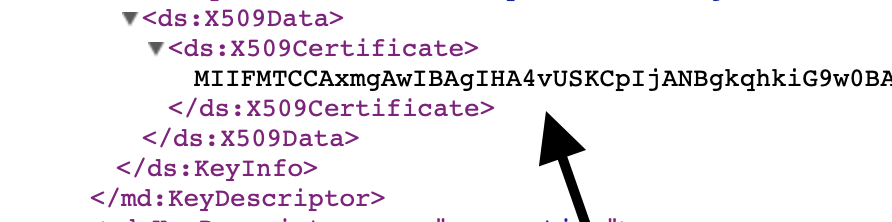
Set-MsolDomainAuthentication –DomainName example.nl –IssuerUri example.workspaceoneaccess.com –Authentication Federated -FederationBrandName "Zevenster" -PassiveLogOnUri https://example.workspaceoneaccess.com:443/SAAS/API/1.0/POST/sso -ActiveLogOnUri https://example.workspaceoneaccess.com/SAAS/auth/wsfed/active/logon -LogOffUri https://login.microsoftonline.com/logout.srf -MetadataExchangeUri https://example.workspaceoneaccess.com/SAAS/auth/wsfed/services/mex -SigningCertificate MIIFMTCCAxmgAwIBAgIHA4vUSKCpIjANBgkqhkiG9w0BAQsFADBQMSAwHgYDVQQDDBdWTXdhcmUgSAwfJeeRNT+Yu7g5RUhtT9DM1WDzOIGAG7Y9LrC7xPHLDpn7VJBcFTjHJ5dZ7g/T73173RwtBXzBC+z85t14DJ9l2gy8mRNPT86YsNu1i1FPc1d+kV0/abEDrFqCGjeNnMV6m/tnXNNKT9qzX+4Gb1iiqXEaIBZ+CIATOSVLfUtssF51+57iGPog6vMVjA7RNmqtvvHACmxA==
After you have successfully entered the command, the domain should be federated. You can verify again with:
Get-MSolDomain

Add Office 365 application to Workspace ONE Access:
Before adding the Office365 application, you will need to make sure that the objectGUID attribute is synced from your Active Directory.

Type in 'objectGUID' and hit Save


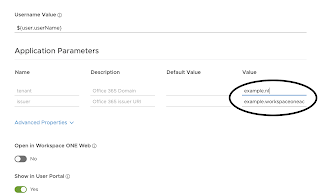
- Office 365 Domain = your domain like example.nl
- Office 365 Issuer = your Access URL like example.workspaceoneaccess.com

Click on Next and Next again to assign the application to your users. (All Users is the default group for all the users)

After that hit Save and the applications should be available to your (test)users.
Comments
Post a Comment